
There are two kinds of service calls. The first kind: you walk in, check a few things, figure out what's wrong, fix it, and leave. The second kind: you replace a part, it doesn't fix it, you replace another part, it still doesn't fix it, you call a more experienced tech, and you're there for three hours.
The difference between those two calls isn't experience. It's process. The technicians who consistently diagnose right the first time aren't smarter — they're more systematic.
The Problem With Guessing
Most diagnostic mistakes start the same way: the tech hears the symptom, jumps to the most likely cause based on gut feel, replaces the part, and hopes. Sometimes it works. When it does, it reinforces the guessing habit. When it doesn't, you've now spent the customer's money on a part they didn't need, added time to the call, and still haven't fixed the problem.
Guessing feels fast in the moment. But the callbacks, the warranty replacements, and the reputation damage add up. Systematic diagnosis is slower at first and faster in the long run.
Step 1: Gather Information Before You Touch Anything
The customer has information you don't have. Before you open a panel or pull out a meter, ask questions.
When did this start? Was there a noise, a smell, or anything unusual before it stopped working? Has this happened before? Has anyone else looked at it? Was anything changed recently — new thermostat, new filter, any work done on the house?
Those answers narrow your search before you've even looked at the equipment. A system that stopped working right after a new thermostat was installed is a different call than one that slowly lost heating capacity over three weeks.
Also look around. What's the condition of the filter? Is there ice on the refrigerant lines? Are the registers open? Is there standing water near the unit? These observations cost you nothing and often point directly at the cause.
Step 2: Check the Obvious First
Before you run any tests, eliminate the simple stuff. Thermostat set correctly? Power on at the unit? Disconnect pulled? Breaker tripped? Gas valve open? These take two minutes and they catch a surprising number of problems — especially on calls where someone else has already "tried to fix it" before calling you.
This isn't beneath you. Senior technicians check the obvious first because they've been burned by skipping it. Nothing is more embarrassing than spending forty minutes diagnosing a system that was off at the switch.
Step 3: Measure Before You Assume
This is where most diagnostic errors happen. A tech suspects the capacitor is bad, so they replace it. Maybe it was the capacitor. Maybe it wasn't — they'll never know, because they didn't measure it first.
Measure everything before you replace anything. Check voltage at the disconnect and at the unit. Check capacitor microfarad values. Check resistance across the contactor. Check temperature rise or temperature split depending on the system. Check refrigerant pressures if needed.
These measurements do two things: they tell you what's actually wrong, and they give you documentation if the repair is questioned later.
A multimeter and a manifold gauge set are not optional tools. If you're making repair decisions without them, you're guessing.
Step 4: Narrow Down With Systematic Testing
Once you have your measurements, you're looking for readings that are outside of spec. But out-of-spec readings tell you there's a problem in a system — they don't always tell you which component caused it.
Work from cause to effect. Low refrigerant pressure on the suction side could mean an undercharge, a restriction, or a bad metering device. Before you recover and recharge, check for restrictions. Before you assume the metering device is bad, verify your superheat targets match the conditions.
Ask yourself: if this component failed, what readings would that produce? Then check whether those readings match what you're seeing. If they do, you have strong evidence. If they don't, keep looking.
Step 5: Verify the Fix Before You Leave
You replaced the part. The system is running. You're about to leave. Don't.
Let the system run through a full cycle. Check your measurements again — temperatures, pressures, voltages, whatever was out of spec before. Confirm they're now within normal range. Watch the system for five minutes. Clear any fault codes and confirm they don't come back.
This is the step that prevents callbacks. A system that appears to be running isn't necessarily fixed. The measurement that was out of spec should now be in spec. If it's not, the job isn't done.
Walking Through a Real Call: "No Heat"
Here's what systematic diagnosis looks like in practice.
Customer says the furnace isn't heating. You ask questions: it started two days ago, no unusual sounds beforehand, nobody touched the thermostat.
You check the obvious: thermostat is set to heat, set point is above room temperature, power is on at the unit, the gas valve is open. All clear.
You look at the system: the inducer is running, but the burners aren't lighting. You pull the fault code — pressure switch open.
Now you measure before assuming. You check the pressure switch — it's reading open when it should be closed during inducer operation. Is the switch actually bad, or is there a reason it's staying open?
You check the condensate drain — it's blocked. Blocked drain is causing the pressure switch to trip. You clear the drain, the pressure switch closes, the burners light.
You let it run through two full cycles. Temperatures come up normally. You check the condensate drain flow one more time before you leave. Done.
If you had just replaced the pressure switch, you would have been called back within a week with the same complaint.
Common Diagnostic Mistakes
Replacing the most common part first without testing it. You'll be right sometimes and wrong often enough to hurt your reputation.
Fixing the symptom instead of the cause. A tripped limit switch is a symptom — find out why it's tripping before you just reset it.
Not talking to the customer. They have information that saves you time. Use it.
Skipping the verification step. The job isn't done until the system runs correctly through a full cycle with your measurements confirming it.
The goal is to be the tech who fixes it right the first time, every time. That reputation compounds faster than any other thing you can do in this trade.
Was this helpful?
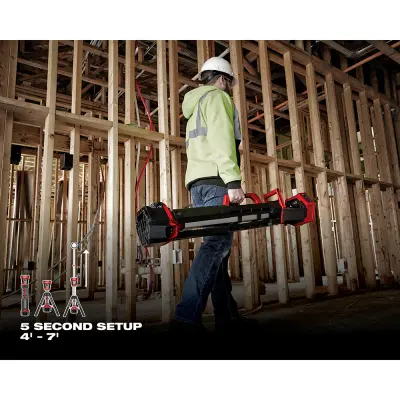
M18 ROCKET™ Tower Light
5-second setup. The jobsite light every tech needs.
Shop at Home Depot →Keep Reading

Got a question? A funny story? A win from the field?
Drop your email and share what's on your mind. Best questions become articles.